Contact Us
 (877) 248-1631
Broaching internal hexes and squares can be handled with the same CNC Broach Tools holders and inserts already used for keyways, splines, and special profiles. Instead of broaching the entire shape in one pass, the process is usually done by machining the main walls first, then broaching each corner individually.
This approach works well when a customer needs sharp internal corners in a hex, square, or similar polygon-shaped bore.
Start with the Right Tool Holder
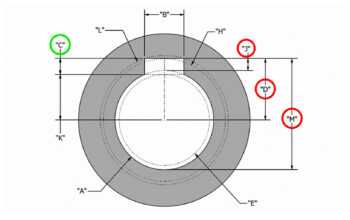
The first step is selecting the correct tool holder from one of our available holder sizes. When choosing the holder, we look at the application’s bore diameter, length of cut, and clearance requirements.
The goal is to choose a holder that:
- Fits inside the bore
- Has enough length of cut for the feature
- Uses the widest insert possible for the application
- Provides proper rigidity for the broaching operation
Once the correct holder is selected, we modify the insert geometry for the corner shape being broached.
For square corners, the insert is made with a 90-degree point.
For hex corners, the insert is made with a 120-degree point.
Why the Walls Should Usually Be Milled First
Our carbide broach inserts are narrow because they are originally designed for keyways, splines, and similar internal features. Because of that, we usually recommend milling the walls of the square or hex first with an endmill.
After the main shape is milled, the CNC broach tool is used to clean out each corner individually.
For example:
A square requires 4 indexes, one for each corner.
A hex requires 6 indexes, one for each corner.
This method keeps the broaching operation focused only on the material that the endmill could not remove, rather than trying to broach the entire shape from solid.
Broaching the Corners
Once the walls are milled, the broach tool is positioned at each corner and fed through the feature. The machine indexes to the next corner, and the process repeats until all corners are complete.
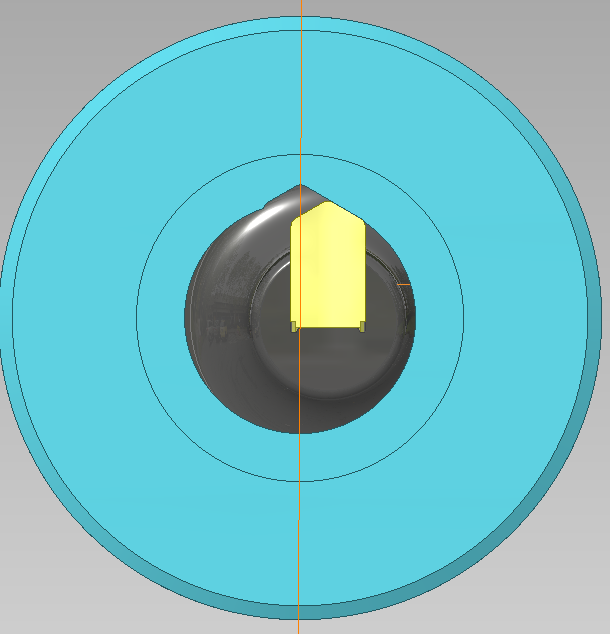
The attached images show a hex application where the broach insert is stepped around the part to remove each corner.
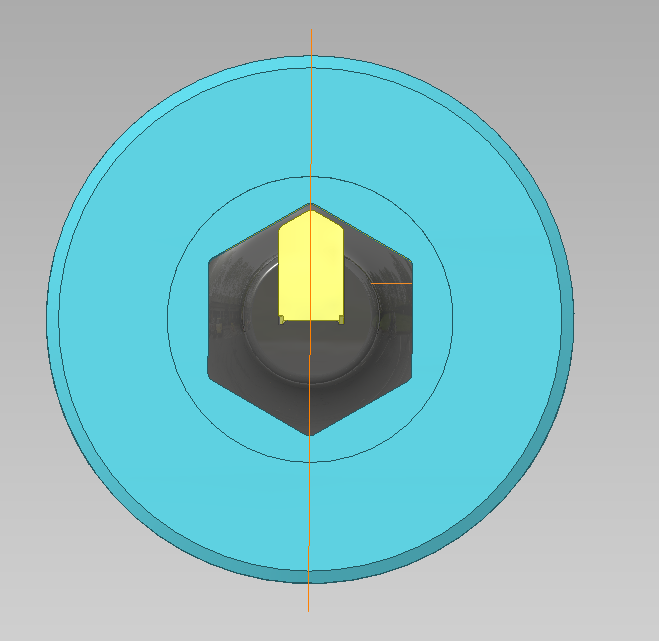
This is similar in concept to broaching a spline. A hex can be programmed like a 6-tooth spline, with each index representing one corner of the hex.
A square would be similar to a 4-tooth spline, with four index positions.
Customers can use our CNC Broach spline program generator to help create the indexing-style broaching program:
Depth of Cut and Feed Rate
Recommended depth of cut and feed rate depend on the material, insert width, tool holder, and machine setup.
For starting recommendations, use our keyway cutter speed and feed chart here:
As with any broaching application, rigidity matters. Use proper clamping, minimize overhang, and make sure the tool is aligned correctly before running production parts.
Optional Method: Stepping Over with Y-Axis
If the customer has a machine with Y-axis capability, there is another option.
Instead of milling the walls completely before broaching, the tool can be stepped over in Y and broached tangent to the wall of the hex or square. This allows the customer to remove material in controlled passes and work the broach along the side of the feature.
This method may be useful when the customer wants to use the broach tool to generate more of the shape, but it requires the correct machine capability, programming, and setup.
Summary
Broaching internal hexes and squares with CNC Broach Tools is possible using our existing holders and custom-point inserts. The most common method is to mill the walls first, then use a 90-degree or 120-degree broach insert to clean out each corner individually.
For squares, broach 4 indexed corners.
For hexes, broach 6 indexed corners.
This method gives customers a practical way to create sharp internal polygon corners using standard CNC equipment and CNC Broach Tools’ existing broaching system.